
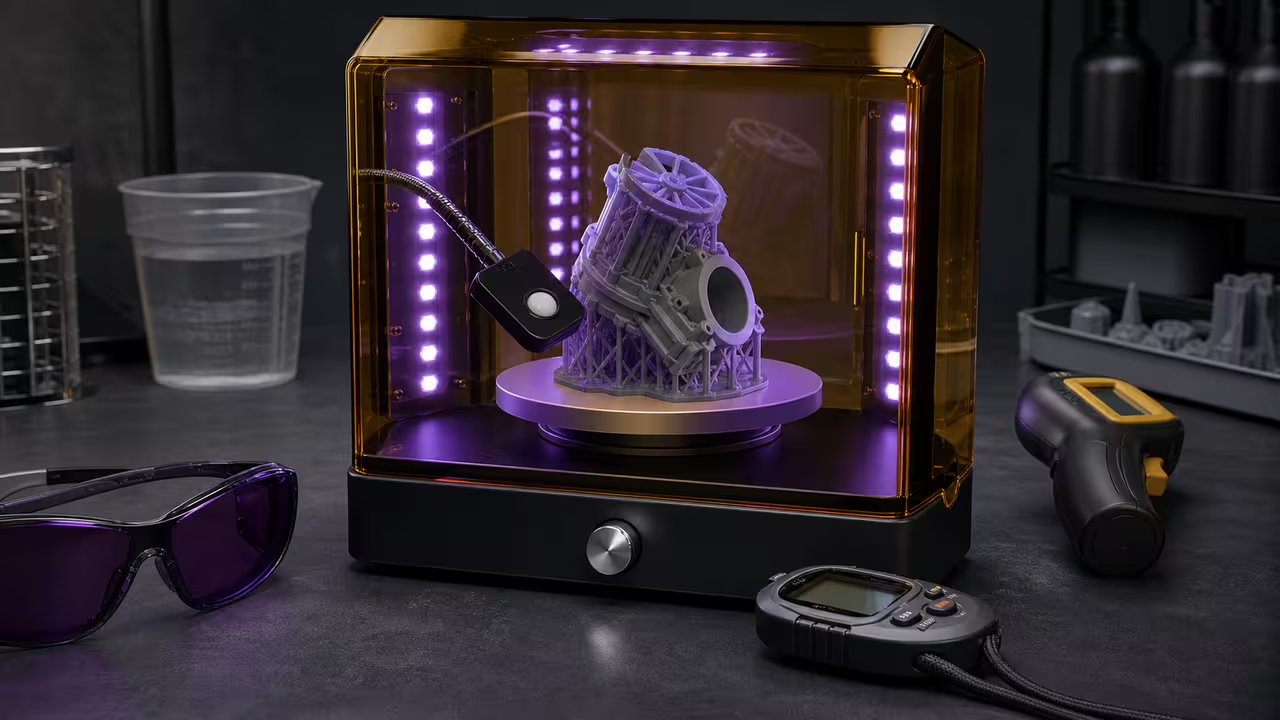
Introduction to resin UV post-cure dose planning
Resin post-curing gives a washed SLA, DLP, or LCD print additional UV exposure after printing so its polymer network can reach the intended state of cure. Many printed resins are not fully cured on the machine because that helps retain detail, limit stress, and keep supports manageable. After washing, the relevant target is often an energy dose, commonly stated in J/cm². Reaching an appropriate dose can improve strength, chemical resistance, and surface hardness while helping avoid over-cure effects such as brittleness, yellowing, or warping.
This resin post-cure calculator turns that dose target into an exposure plan: an exact exposure time, the required number of turntable rotations, the dose delivered after rounding to full rotations, and a simple temperature check based on the chamber’s measured heating rate. It is useful for desktop curing stations and for shop procedures that need consistent, documented runs.
What the resin post-cure planner calculates
This resin UV dose planner is for setting up and standardizing a curing workflow. It translates a target dose into a runtime that can be repeated, particularly when a rotating part receives uneven direct light across its surfaces. Its outputs are most useful after you have measured the station and can reuse those measurements for comparable parts and placements.
It does not replace resin manufacturer instructions or predict every factor that affects final cure quality. Resin chemistry, pigment loading, UV wavelength, oxygen inhibition, part thickness, and surface finish can all change the suitable cure. Use the calculation as a documented starting point, then validate it with a representative part or coupon and revise the dose target or coverage estimate as needed.
Resin post-cure formula: dose, intensity, coverage, and time
For a resin print under UV light, the calculator starts with the energy relationship at the part surface:
D ≈ I × t
To keep the resin data sheet and UV-meter units consistent:
- D = dose in J/cm²
- I = intensity in mW/cm²
- t = time in seconds
Because 1 W = 1 J/s and 1 mW = 0.001 W, solving for time from an intensity in mW/cm² requires a factor of 1000. A rotating resin print also may not receive useful direct illumination on every face for the entire run. The calculator represents that with a coverage fraction C from 0 to 1:
Effective-dose model used by the calculator:
coverageFraction = coveragePct / 100
effectiveIntensityMwCm2 = intensityMwCm2 * coverageFraction
timeSeconds = doseJcm2 * 1000 / effectiveIntensityMwCm2
rotations = ceil(timeSeconds / rotationPeriodSeconds)
For post-cure time, the relationship is rearranged as:
Assumptions: UV intensity is treated as an average at the resin part surface, coverage as an average fraction of useful exposure during rotation, and temperature rise as linear over the planned runtime. Those simplifications support planning and work instructions, not a substitute for resin-specific directions and test cures.
Resin post-cure inputs explained
Required resin energy dose (J/cm²)
For this resin post-cure dose field, use the vendor’s target from its technical documentation. If the documentation gives a range, begin with a value appropriate to the part and validate it rather than assuming the highest dose is best. For engineering resins, follow a vendor-specified time, temperature, or dose procedure when one is provided.
If the resin documentation gives only a time, such as a stated number of minutes in a particular chamber, you can measure that chamber’s intensity and estimate an implied dose. That estimate can serve as a repeatable internal reference for the same resin and workflow, including when equipment later changes.
Measured lamp intensity at part (mW/cm²)
Measure resin-curing intensity where the part sits rather than relying on an LED’s advertised rating. When possible, take the reading with the chamber closed and the turntable operating so reflections and shielding are represented. If intensity varies across the chamber, make several readings and use a conservative average.
Measurement tip: place a small UV-meter sensor at the height of the print surfaces that matter most. For tall resin parts, readings at more than one height can reveal a weak zone; using the lowest relevant reading is often the more cautious choice. The objective is a repeatable measurement that represents normal part placement.
Percent coverage per rotation (%)
For a rotating resin print, coverage is a practical estimate of shadowing and light directionality. A single-sided lamp and turntable can leave a substantially smaller share of the surface effectively exposed than a multi-sided LED chamber with reflective walls. If a support-heavy face remains shaded, lower the coverage estimate or plan to reposition the part during curing.
Coverage is deliberately an estimate to refine through validation. If prints repeatedly seem under-cured, such as remaining tacky or soft, increasing the target dose or lowering the coverage estimate will lengthen the plan. If parts become brittle, yellow, or warped, consider a lower dose, better cooling, or higher actual coverage from improved reflectivity and spacing.
Turntable rotation period (seconds)
For resin post-curing, measure the time for one complete 360° turntable rotation. Mark the platform, time several rotations, and average them. The calculator uses that period to express the exposure plan as a rotation count and as a full-rotation runtime that is straightforward to repeat.
Whole rotations can make a resin curing procedure easier to document than stopping at an arbitrary second. The calculator rounds upward, so the full-rotation run meets or exceeds the target dose under the stated coverage assumption.
Maximum safe surface temperature (°C), ambient temperature (°C), and rise rate (°C/min)
Resin UV curing chambers can warm a part significantly. Enter a maximum safe temperature appropriate to the resin and part, measure chamber ambient temperature before the run, and estimate rise rate by recording the temperature change while the lights operate for a known time. The calculator projects a peak temperature for the rounded full-rotation runtime and warns when that projection crosses the entered limit.
Important: this resin post-cure temperature model is linear. Actual chambers may heat quickly and then level off, while print temperature can differ from chamber-air temperature. Treat the warning as a reason to verify conditions with a suitable thermometer or thermocouple when operating near the limit.
Worked example: planning a resin UV cure
Suppose a resin calls for 8 J/cm², the measured intensity at the part is 10 mW/cm², estimated coverage per rotation is 60%, and the turntable period is 30 s. Effective intensity is 10 × 0.60 = 6 mW/cm², so the calculated exposure time is:
t = (8 × 1000) / 6 ≈ 1333 s ≈ 22.2 min
The rotation estimate is 1333 / 30 ≈ 44.4, so the calculator rounds up to 45 full rotations, or 22.5 minutes. That rounded runtime delivers slightly more than the target dose. With an ambient temperature of 25°C and a rise rate of 2°C/min, the projected peak is 25 + 2 × 22.5 = 70°C. If the maximum safe temperature is 55°C, the calculator will flag the run so you can consider shorter cycles with cooling, lower lamp output, or improved ventilation.
Using dose calculations to standardize resin curing stations
Resin post-cure dose planning can help compare two stations that cure the same material differently. A small chamber with directional LEDs may have lower measured intensity and less useful coverage than a reflective chamber with LEDs on several sides. Recording intensity and coverage for each station makes the difference explicit instead of relying only on a timer setting.
Enter each station’s measured intensity, coverage estimate, and turntable period with the same resin dose target. The lower effective intensity will require more exposure time, while the rotation calculation converts each runtime into a repeatable instruction. Validate both plans with representative prints or coupons, then retain the settings that produce the desired result. Dose-based planning separates what the resin needs from what each curing station actually delivers.
Quality checks after resin post-curing
After a calculated resin post-cure run, pair the timing plan with a few practical observations. These checks are not exhaustive, but they can indicate whether the dose and heat exposure are near a useful range:
- Surface feel: a properly cured surface is typically dry and non-tacky after cooling. Persistent tackiness can indicate under-cure, insufficient washing, or oxygen inhibition at the surface.
- Odor and solvent resistance: strong residual odor or softening after brief IPA contact can indicate under-cure for some resins, although some odor is normal. Follow the resin’s safety guidance.
- Support removal behavior: supports that snap away too easily and leave brittle scars may indicate excessive cure; supports that smear or deform may indicate under-cure or a still-warm part.
- Dimensional stability: warping during or after UV cure can point to heat buildup, uneven illumination, or excessive dose for thin sections.
If resin post-cure results need adjustment, change one variable at a time. Common first steps are a modest dose reduction, better coverage through spacing or repositioning, or shorter cycles separated by cooling time.
Practical resin post-cure tips and limitations
- Measure, then standardize. Once a curing station has validated intensity and temperature-rise measurements, reuse them for similar resin parts and placements.
- Coverage is the largest uncertainty. Complex geometry, deep cavities, and dense supports reduce useful UV exposure. Use a lower coverage percentage when uncertain and validate with a representative print.
- Heat can constrain the UV run. When the thermal warning appears, multiple curing cycles with cooling can reduce warping risk while preserving the planned total exposure.
- Account for wavelength. Many resins are optimized for 405 nm, while some specialty materials use 385 nm or other systems. Intensity readings are meaningful only when the meter and lamp are appropriate to the resin’s sensitivity.
- Part orientation matters. Tall prints can shade themselves, and hollow prints can retain heat. Reorienting the part or curing in more than one orientation may improve uniformity.
- Safety. Avoid direct UV exposure to eyes and skin, keep chamber interlocks intact, handle uncured resin with gloves, and follow the resin SDS.
Related resin-print workflow tools
For a documented resin-print workflow, you may also use the resin viscosity adjustment calculator, annealing shrinkage calculator, and 3D printing time estimator. These tools cover separate stages; this page calculates only UV post-cure timing, rotations, delivered dose, and the simple heat estimate.
FAQ: resin UV post-cure planning
What if my UV meter reads in mW/cm² but my resin sheet gives minutes?
Use the manufacturer’s stated resin post-cure time together with an intensity reading at the part to estimate an implied dose: D ≈ I × t × C / 1000, where C is your coverage fraction. That estimated dose can become a repeatable target for the same station and documented workflow.
Should I always cure resin longer “just to be safe”?
Not necessarily. Excess UV exposure and heat can increase brittleness, discoloration, and warping, especially in thin walls or long flat parts. Improving coverage or using shorter cycles with cooling can be preferable to extending one hot curing cycle.
Why does the calculator round up to full rotations?
A whole number of turntable rotations is easier to repeat than stopping at an exact second. Rounding up also makes the planned run meet or slightly exceed the target dose under the selected coverage assumption. When tighter timing is required, use the exact seconds output as the timer value and treat the rotation count as a planning reference.
Arcade Mini-Game: 3D Printer Resin Post-Cure Dose Calculator Calibration Run
Use this resin-curing calibration exercise to distinguish measurements that support a UV dose plan from assumptions that can lead to uneven or overheated post-cures.
Start the game, then use your pointer or arrow keys to catch useful inputs and avoid bad assumptions.